Contents:
- How to Make a DIY Bridal Bouquet (Direct Answer)
- Gathering Supplies: What You’ll Need Before You Begin
- Essential Tools
- Flower Choices That Work Well
- Conditioning and Preparing Flowers
- Step 1: Unpack and Clean
- Step 2: Conditioning
- Step 3: Pre-Sorting
- Assembling the Bouquet: The Step-by-Step Walkthrough
- Step 1: Start with a Focal Point
- Step 2: Build Around with Supporting Flowers
- Step 3: Shape and Check Balance
- Step 4: Secure and Trim
- Step 5: Ribbon Finish
- Pro Tips for a Professional-Looking DIY Bouquet
- Keeping Flowers Fresh
- Color Harmony
- Sizing for Comfort and Style
- Handling on the Day
- Popular Styles for DIY Bridal Bouquets (2026)
- Common Mistakes (And How to Avoid Them)
- Quick List: DIY Bridal Bouquet Timeline
- FAQ: DIY Bridal Bouquets
- How many flowers do I need for a bridal bouquet?
- How long will a DIY bridal bouquet last?
- Can I make my bridal bouquet the night before?
- How do I keep my DIY bouquet from falling apart?
- Is it cheaper to make your own bridal bouquet in the US?
DIY Bridal Bouquet Step-by-Step
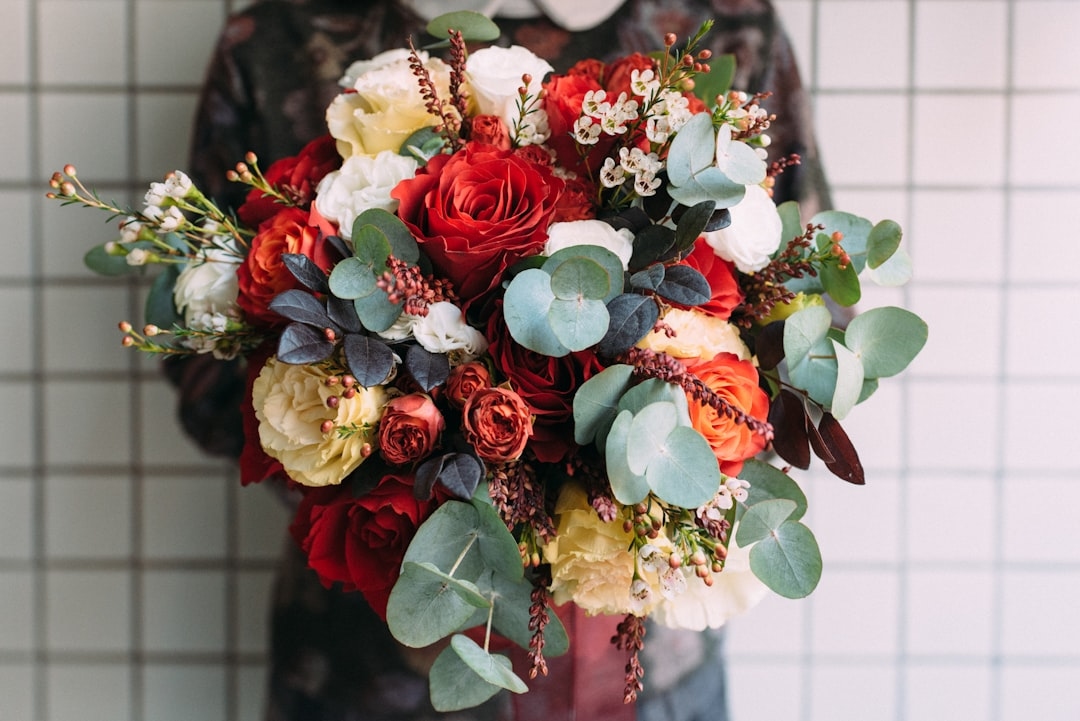
March in May with a clutch of sweet pea and peony, or say yes under autumn leaves with a cascade of eucalyptus and garden roses. Each year, more US brides are swapping expensive, cookie-cutter bouquets for flowers they assemble with their own hands. No wonder: The average professionally-made bridal bouquet in the US reached $257 in 2026, according to Teleflora, while a DIY version using premium flowers can come in under $80. For many, it’s not just about saving money–it’s memory-making, creativity, and walking down the aisle holding something that feels unmistakably yours.
How to Make a DIY Bridal Bouquet (Direct Answer)
To make a DIY bridal bouquet:
- Choose and condition flowers (fresh, clean stems–see list below).
- Gather supplies: sharp floral shears, floral tape, ribbon, pins.
- Arrange central blooms in your hand, adding supporting flowers and greenery around.
- Spiral stems as you go.
- Secure tightly with tape, trim stems, and wrap with ribbon.
- Mist and refrigerate until the ceremony.
Expect total hands-on time: 45-90 minutes. For best results, assemble the bouquet 1-2 days before your wedding, and keep it cool.
Gathering Supplies: What You’ll Need Before You Begin
A smooth DIY bouquet day starts with the right prep. No scrambling for tape while your roses wilt.
Essential Tools
- Floral shears (Felco is a florist favorite, $35 at Home Depot)
- Floral tape (green, waterproof, 1/2-inch)
- Ribbon of your choice (double-faced satin holds best)
- Straight corsage pins or pearl-head bouquet pins
- 5-gallon bucket for conditioning flowers
- Clean towels or paper towels
- Optional: chicken wire or bouquet holder for complex shapes
Flower Choices That Work Well
For classic US-style bouquets (2026’s trending picks):
- Peonies ($6-9/stem, spring-early summer)
- Garden roses (fragrant, $4-8/stem)
- Ranunculus (romantic, $3-6/stem)
- Eucalyptus (seeded or silver dollar, $2-3/bunch)
- Lisianthus, hydrangea, dahlias (seasonal)
Order from trusted US flower wholesalers (FiftyFlowers, Flowers for Dreams) or local farmers’ markets for freshest options.
“Conditioning flowers–cutting stems under water and giving them a few hours to hydrate–matters more than the variety you choose,” says Ayesha Bellamy, Certified Master Florist (American Institute of Floral Designers, 2026).
Conditioning and Preparing Flowers
Think of this as setting the stage: Clean, hydrated flowers last longer and look more vibrant.
Step 1: Unpack and Clean
- Remove all packaging as soon as your delivery arrives.
- Strip lower leaves and thorns from each stem (anything that will sit below the bouquet tie-point).
- Check for bruised petals or wilted leaves; discard or trim as needed.
Step 2: Conditioning
- Cut each stem at a sharp angle, under water to prevent air bubbles.
- Place immediately in a bucket of cool, clean water (add flower food if provided).
- Let flowers hydrate for 4-12 hours in a cool place. Hydration = longevity.
Step 3: Pre-Sorting
Organize stems by type and length. Lay out focal flowers (roses, peonies), fillers, and greenery in separate groups for easy grabbing as you build your bouquet. Pro tip: Use floral wire to reinforce soft stems like ranunculus.
Assembling the Bouquet: The Step-by-Step Walkthrough
This is the magic moment. By following a spiral technique (used by pro US florists like Amy McClure, Seattle), your bouquet will look lush from every angle and stay together better.
Step 1: Start with a Focal Point
Select 3-4 statement flowers. Hold them together in one hand, just below the blossoms. Angle the blooms so their faces are visible and slightly outward.
Step 2: Build Around with Supporting Flowers
Add filler flowers and bits of greenery, laying each new stem at a 45-degree angle to the previous. Turn the bouquet as you add, always spiraling in the same direction.
Step 3: Shape and Check Balance
Every several stems, pause to step back and check your shape in a mirror. Keep the bouquet’s top dome even, but don’t aim for machine-perfection–a little wildness feels modern and romantic in 2026.
Step 4: Secure and Trim
Once satisfied with fullness and shape:
- Bind the stems tightly with floral tape, wrapping several times at the tie-point (about where your hands naturally grip).
- Cut stem ends to a uniform length, leaving 8-10 inches below the tie for holding.
Step 5: Ribbon Finish
Wrap your chosen ribbon tightly around the floral tape, overlapping edges slightly. Pin discreetly into the stems to secure. Leave ribbon tails long for drama, or tuck under for a classic look.
Pro Tips for a Professional-Looking DIY Bouquet
Keeping Flowers Fresh
- Store finished bouquets in water until just before the ceremony.
- Mist gently with cool water (not on satin ribbon).
- Refrigerate at 38-42°F if possible–never with fruit, which releases ethylene gas and speeds wilting.
Color Harmony
Stick with 2-3 main hues for a modern, pulled-together look. “Mixing too many colors gets chaotic fast in person and photos,” advises Molly Tran, wedding floral designer (New York City, 2026).
Sizing for Comfort and Style
Most US brides prefer bouquets around 10-12 inches wide. Go larger if your dress is simple; keep it petite (8-10 inches) for ornate gowns.
Handling on the Day
Dry the stems with a towel just before your walk to avoid water marks on your dress. Hold the bouquet low–belly button level, not up at your chest–for a relaxed silhouette.
Popular Styles for DIY Bridal Bouquets (2026)
Here’s how different bouquet shapes look and feel, with their pros and cons for DIY crafters:
| Style | Description | Best For | DIY Difficulty |
|---|---|---|---|
| Round/Posy | Compact dome, uniform size | Classic/traditional weddings | Easy |
| Cascade | Flowing, “waterfall” drop of flowers | Glamorous, formal settings | Hard |
| Hand-Tied | Looser, stems visible, ‘just-picked’ look | Boho, rustic, modern brides | Moderate |
| Asymmetrical | Wild, organic, longer on one side | Editorial, trendy styles | Moderate |
“Don’t be afraid to let your bouquet reflect your personality–whether that means farm-fresh and wild or sleek and all-white,” says Amy McClure.
Common Mistakes (And How to Avoid Them)
- Overstuffing: Cramming too many stems makes arranging unwieldy and bulky. Stick to 20-27 stems for a balanced mid-size bouquet.
- Skipping conditioning: Unconditioned flowers wilt by ceremony time.
- Leaving stems too long: Harder to hold (and easy to drip water on your dress).
- Forgetting a backup: Always buy 10% more stems than the recipe calls for in case of breakage or bruising.
Quick List: DIY Bridal Bouquet Timeline
- 1 Month Out: Practice with grocery store flowers; test your skills.
- 2-3 Weeks Out: Finalize your flower/greenery recipe, order from supplier.
- 2 Days Before: Flowers delivered, condition overnight.
- 1 Day Before: Assemble bouquet, store in cool water.
- Wedding Day: Dry stems, affix fresh ribbon if needed, give the bouquet a gentle mist.
FAQ: DIY Bridal Bouquets
How many flowers do I need for a bridal bouquet?
A typical mid-size hand-tied bouquet uses 20-27 stems in total:
- 7-9 focal blooms (roses, peonies)
- 7-9 secondary (ranunculus, lisianthus)
- 6-8 fillers/greens (eucalyptus, ruscus, baby’s breath)
Adjust up for very large bouquets, or down for minimal styles.
How long will a DIY bridal bouquet last?
With proper conditioning and storage, a DIY bouquet will stay fresh for 24-48 hours. Refrigeration at 38-42°F stretches vase life, but do not freeze or store with fruit.
Can I make my bridal bouquet the night before?
Yes–most pros recommend assembling 24 hours before the event. Store finished bouquets in clean, cool water, away from direct sunlight and heat.
How do I keep my DIY bouquet from falling apart?
Wrap stems tightly with floral tape at the grip point, then finish with ribbon and pins. Avoid handling the bouquet roughly, and use sturdy flowers as your base.
Is it cheaper to make your own bridal bouquet in the US?
Generally yes. In 2026, DIY bouquets with premium blooms often cost $60-$90, while professional US florists charge $200+ due to labor and design fees (Teleflora, 2026).
Want your bouquet to look as if it stepped out of a Vogue Weddings shoot? Practice with a trial run a few weeks before your big day; snap photos and tweak your recipe as you go. And if arranging flowers becomes your new obsession–why not start with your own bridal bouquet, and turn a joyful task into a lifelong hobby?


Add Comment